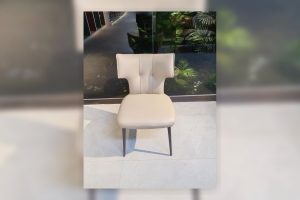
Reduce a large table visual weight by exposing floor around it, lowering chair backs, simplifying the centerpiece, and increasing tonal contrast between the base, top, floor, and walls. Do not add more objects to disguise the mass. The practical question behind make large dining table look lighter is not whether one object looks attractive in isolation. It is whether people can reach, sit, move, clean, and reset the space without repeatedly correcting the furniture.
Quick answer: Protect at least 36 inches (91 cm) around usable sides and more on major routes. Compare the table footprint with the rug and lighting width; a fixture that is roughly one-half to two-thirds of the table width often feels connected without duplicating its bulk. Use these figures as planning references, then verify the actual product, room, users, and local requirements. Small differences in base shape, upholstery thickness, floor level, and traffic direction can change the decision.
Key Takeaways
- Reduce a large table visual weight by exposing floor around it, lowering chair backs, simplifying the centerpiece, and increasing tonal contrast between the base, top, floor, and walls. Do not add more objects to disguise the mass.
- Protect at least 36 inches (91 cm) around usable sides and more on major routes. Compare the table footprint with the rug and lighting width; a fixture that is roughly one-half to two-thirds of the table width often feels connected without duplicating its bulk.
- Use slim armless chairs that preserve sightlines to the base and floor.
- Choose a light or quiet rug large enough for chair movement rather than one that frames the table tightly.
- Approve the complete furniture-and-room relationship with a sample or full-size mock-up.
Start With the Real Use Case
Write down who uses the space, what they carry, how long they stay, and which route must remain available. Include the difficult moment: a chair pulled out, a guest carrying a tray, a drawer open, a table joined for a group, or a drink placed from the least convenient seat. That active state is the one the furniture must support.
Reduce a large table visual weight by exposing floor around it, lowering chair backs, simplifying the centerpiece, and increasing tonal contrast between the base, top, floor, and walls. Do not add more objects to disguise the mass. A useful decision therefore starts with observed behavior and measurable constraints. Style can narrow the final shortlist, but it should not conceal a reach problem, unstable base, unsuitable finish, or blocked route.
Size the Occupied Room, Not the Empty Table
Dining plans are often drawn with every chair tucked neatly under the top, but the room is used with bodies, pulled-out chairs, open drawers, and people passing behind one another. Build the plan from the occupied chair back. Mark the tabletop, place the actual chair or a full-size template, pull it to a realistic dining position, and then test the route. Give the busiest side the most space instead of distributing clearance evenly when doors, kitchens, or sideboards make the traffic asymmetric.
Seat count depends on usable edge length and under-table geometry. About 24 inches of edge per diner is a practical starting point, not a guarantee. Wide arms, splayed chair legs, thick aprons, and double pedestals can reduce capacity. Set a plate, glass, cutlery, and shared serving piece at every place during the mock-up. If the place settings overlap before the chairs arrive, the nominal capacity is too optimistic for the intended meals.
Choose the surface for the hardest normal day rather than the rare perfect dinner. A home office needs low glare and a fast clearing routine. A family table needs finish repairability and realistic heat and stain care. A hospitality top needs repeatable cleaning, edge durability, stable base attachment, and replaceable components. Ask for construction details below the decorative surface because substrate and fixing method influence sag, movement, and service life.
A Measured Way to Evaluate make large dining table look lighter
| Check | What to record | Pass condition |
|---|---|---|
| Room geometry | Walls, doors, fixed storage, floor changes and main route | The active furniture state does not obstruct required movement |
| Human fit | Reach, clear width, knee space, posture and pull-out movement | Regular users can complete the task without twisting or collision |
| Product geometry | Top, seat, apron, base, legs, glides and moving parts | The complete footprint fits in both stored and working positions |
| Care cycle | Approved cleaner, access, drying, adjustment and spare parts | Routine service fits the available labor and downtime |
Protect at least 36 inches (91 cm) around usable sides and more on major routes. Compare the table footprint with the rug and lighting width; a fixture that is roughly one-half to two-thirds of the table width often feels connected without duplicating its bulk. Measure twice: once with the furniture empty and once with it in normal use. Note the narrowest point instead of averaging a generous side with a tight side. For movable pieces, mark both the home position and every expected working position.
Three Checks That Prevent an Expensive Mismatch
First check: Use slim armless chairs that preserve
Use slim armless chairs that preserve sightlines to the base and floor. Treat this as a pass-or-fail observation rather than a styling preference. Record the dimensions, photograph the arrangement from the normal approach, and repeat the check with the furniture in its active position. A result that works only while every chair or moving part is tucked away is not a durable layout.
Second check: Choose a light or quiet rug
Choose a light or quiet rug large enough for chair movement rather than one that frames the table tightly. Treat this as a pass-or-fail observation rather than a styling preference. Record the dimensions, photograph the arrangement from the normal approach, and repeat the check with the furniture in its active position. A result that works only while every chair or moving part is tucked away is not a durable layout.
Final check: Keep window treatments and wall art
Keep window treatments and wall art visually calm near the largest furniture mass. Treat this as a pass-or-fail observation rather than a styling preference. Record the dimensions, photograph the arrangement from the normal approach, and repeat the check with the furniture in its active position. A result that works only while every chair or moving part is tucked away is not a durable layout.
Materials, Cleaning and Service Life
Ask for a care sheet before selecting color. Test approved cleaning products on the exact finish or cover sample and allow it to dry before judging the result. Inspect seams, edges, underside fixings, and floor-contact parts because these areas collect soil and show wear first. Heat, moisture, alcohol, oils, and abrasive particles affect materials differently; a generic promise of easy care is not a maintenance plan.
Plan for repairable wear. Glides, fasteners, pads, hinges, and moving hardware should have names and reorder references. Where a surface or cover carries most of the damage, a replaceable component can extend the useful life of the frame. Keep one approved sample out of service so color change and wear can be compared objectively after months of use.
Common Mistakes to Avoid
- Scale error: Adding six high dark chair backs. Correct it during the full-size mock-up, before purchase or installation makes the compromise expensive.
- Use error: Using a dense centerpiece across the full length. Correct it during the full-size mock-up, before purchase or installation makes the compromise expensive.
- Specification gap: Placing a small rug tightly beneath the base. Correct it during the full-size mock-up, before purchase or installation makes the compromise expensive.
- Maintenance blind spot: Pushing the table close to a wall to create empty space elsewhere. Correct it during the full-size mock-up, before purchase or installation makes the compromise expensive.
A Practical Selection Framework
- Define the job. Describe the normal use, peak use, user range, cleaning cycle, and the route that cannot be blocked.
- Measure the active state. Include occupied chairs, opened storage, moved modules, serving reach, and floor-level base projections.
- Build a shortlist. Reject products that miss a critical dimension or lack material and maintenance information before comparing style.
- Test one sample. Place it in the tightest position, use it for the intended task, clean it, move it, and inspect every contact point.
- Record the decision. Save the drawing, finish approval, care method, hardware list, and replacement route with the order.
Specification Checklist
- Top length, width or diameter in every configuration
- Finished height, apron depth and clear knee height
- Base footprint and setback from each seating edge
- Recommended seats with actual chair width
- Extension mechanism, leaf storage and alignment tolerance
- Top construction, finish, heat and cleaning guidance
- Carton dimensions, assembly sequence and floor glides
B2B Sourcing Checklist
For hospitality or development work, approve a dimensioned table-and-chair plan rather than separate product sheets. Confirm top thickness, edge construction, base attachment, leveling range, finish tolerance, cleaning compatibility, replacement availability, packaging, and local compliance responsibilities. Test the tightest bay and most difficult chair position with a production sample before releasing the full quantity.
For any contract application, request clear statements about intended use and applicable testing rather than assuming a residential description covers commercial duty. Confirm who is responsible for final code review, installation, floor fixing where relevant, and in-use inspection. Keep batch numbers and delivery photographs so a later issue can be traced accurately.
Related Product Directions
Use the dimensions and construction details as comparison points, not as a substitute for measuring the room. Relevant starting points include the dining table and chairs, modern rounded dining table, and modern round dining table. For a different base or seating profile, compare the pedestal round dining table, modern white dining table, and modern dining table. The best option is the one that passes the active-use test and still supports the desired material language.
Conclusion
Reduce a large table visual weight by exposing floor around it, lowering chair backs, simplifying the centerpiece, and increasing tonal contrast between the base, top, floor, and walls. Do not add more objects to disguise the mass. Make the decision visible with tape, a sample, and a short written checklist. That small amount of preparation protects comfort, circulation, cleaning time, and long-term value far better than choosing from a single photograph.
Frequently Asked Questions
Do light colors always make a table look smaller?
Not always. Silhouette, base openness, contrast, and surrounding negative space can matter more than top color.
What chairs make a heavy table look lighter?
Slim armless chairs with lower or open backs expose more floor and reduce the continuous visual block.
Should the rug contrast with the table?
Moderate contrast can clarify the silhouette, while very strong contrast may emphasize the footprint; test samples in the room.
Can lighting reduce visual weight?
A proportionate open or slim fixture can draw the eye upward without adding another dense shape above the table.