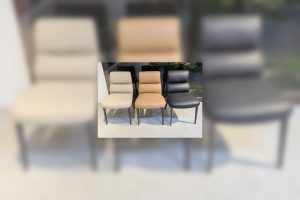
Curved dining-chair backs make seam alignment highly visible. A stitch line can be straight on the sewing table yet appear to wander after the cover is tensioned over a shell. Left and right panels may also pull differently around arms, piping and corners. Buyers should judge seam symmetry on the finished chair, using fixed frame references and the approved upholstery rather than relying only on a flat pattern.
Symmetry does not mean every curve is identical
Some chairs are intentionally asymmetric, and natural materials vary. The objective is to match the approved design: seam paths should relate consistently to the centre line, edges and paired features. Define which differences are expected and which interrupt the visible form.
Use the exact restaurant dining chair upholstery. Stretch, nap, thickness and grain change how a seam settles on a curve.
Establish fixed reference points
Choose structural references such as the chair centre line, seat centre, leg centres or shell edges. Soft folds and piping can move under touch, so they should be measured relative to the frame rather than used as the only reference.
- Top seam distance from chair centre.
- Left and right seam path at matching heights.
- Piping height along paired arms.
- Panel junction position at corners.
- Back-to-seat alignment.
- Pattern or nap direction across panels.
- Zipper and closing seam location.
Inspect from room distance first
Place several chairs in a row under the lighting used in the project. Stand at normal viewing distance and look for a seam that pulls the eye, a panel that appears rotated or one back that reads differently from the others. This check captures the visual effect before close measurements focus attention on tiny details.
Rotate the lineup or change the light direction. Glossy coated materials and directional fabrics can make an aligned seam appear different, so compare geometry and material appearance separately.
Use a centre-line card
Position a plain vertical reference card behind or in front of the chair without pressing the upholstery. Compare where the seam crosses matching horizontal levels. A flexible template from the approved sample can help on complex curves, provided it does not flatten the padding.
Record deviations at named points rather than stating that a seam “looks crooked.” Measurements and annotated photographs let the factory identify whether cutting, sewing, foam or fitting caused the result.
Inspect close workmanship
Follow every seam under side light. Look for skipped or loose stitches, thread fray, changing stitch length, needle holes, exposed allowance and puckering. At panel intersections, confirm that the seam is secure and the material is not pulled into a narrow stress point.
Piping should remain smooth and evenly filled. A cord that twists or changes height can create apparent asymmetry even when the main seam is centred.
Separate sewing from fitting
A correctly sewn cover can become asymmetric if foam is cut unevenly, the shell is off-centre or the cover is pulled harder on one side during fitting. Compare the empty shell and foam templates during production when possible. On finished chairs, use the frame references and compression feel to locate the source.
Do not correct appearance by pulling staples or steaming the cover during receiving unless the supplier approves the process. The change may hide a structural or pattern issue.
Check upholstery tension
Press gently at corresponding left and right areas and observe recovery. One side should not feel dramatically tighter, hollow or more wrinkled without an approved design reason. Uneven tension can move seams during use and create early polishing or creases.
For a commercial dining chair, review the exact production foam and cover combination. A different textile may require a revised pattern rather than the same cutting dimensions.
Include the occupied condition
Have a suitable tester sit centrally and lean back normally. Observe whether seams remain balanced or one panel pulls toward an arm. Check for prominent stitching at body-contact areas. After standing, allow recovery and inspect for permanent movement.
This is a comfort and appearance trial, not a destructive seam-strength test. Formal performance requirements should be addressed through the specified testing program.
Review pattern and nap
Striped, checked, woven or directional materials add another alignment layer. Confirm which line or motif centres on the back and how it continues across panels. Velvet-like nap should run in the approved direction so paired chairs do not appear different in the same light.
Allow for the written cutting plan. Random patterns may not match exactly, but the buyer should approve the intended appearance before production.
Compare across quantity production
Sample chairs from different sewing operators, upholstery stations and cartons. Line them up by model and material. A seam that drifts consistently in one direction suggests a pattern or locating issue; random variation suggests fitting control.
Photograph the approved range, not only the perfect master chair. Production inspectors need examples of the maximum acceptable deviation.
Consider cleaning and handling
Test the approved cleaning method on a sample area and allow it to dry. Moisture, brushing or heat can change surface tension and make puckering more visible. Staff grip points should avoid repeatedly pulling on decorative seams.
Coordinate the chair with the dining table and chairs reset method so the back is moved from a structural zone.
Write an inspection standard
Reference the master sample, panel pattern, seam and piping positions, stitch requirements and material direction. Define measurement points and acceptable visual variation. State that skipped stitches, exposed allowance, broken thread and unexplained asymmetry are not concealed by retouching.
Backrest seam checklist
- Final upholstery and foam construction used.
- Chair centre line and paired references defined.
- Room-distance lineup reviewed.
- Seam paths measured at matching heights.
- Stitches, piping and panel junctions inspected.
- Tension compared left and right.
- Occupied movement and recovery observed.
- Pattern or nap direction confirmed.
- Multiple operators and cartons sampled.
- Approved variation documented with photographs.
If the seam path is inconsistent, hold the affected chairs and determine whether cutting, sewing, foam or fitting needs correction. Send the upholstery reference, centre-line measurements and photos through the contact page.
Set a repeatable viewing standard
Seam symmetry should be judged with the chair upright, the upholstery relaxed, and the camera centered on the backrest datum. Mark a fixed camera height and distance, then compare left and right seam paths at several horizontal stations. Do not pull the cover by hand immediately before photography because temporary tension can hide puckering or unequal seam position. Inspect under both diffuse light and a low side light that reveals waviness. After the chair completes the specified seating cycle, repeat the photographs and measurements to confirm that foam compression has not shifted the cover. For production sampling, retain one approved front view, one rear view, and close-ups of the upper curves so later inspectors can separate normal hand-upholstery variation from a visible construction fault.
Frequently asked questions
Must curved seams be perfectly straight?
No. They should follow the approved curved path consistently and relate correctly to the chair’s centre and paired features.
Can steam correct an uneven seam?
Only through an approved upholstery process. Steam may temporarily change tension and can damage some materials; it should not hide a cutting or fitting error.
Why inspect from a distance before measuring?
The chair is seen as a whole in the room. Distance reveals visual imbalance that small close-up measurements may not explain.
Should every fabric use the same cover pattern?
Not automatically. Stretch, thickness and nap differ. Each material construction should be sampled and approved on the finished chair.